Evaporator coil cleaning is essential for maintaining an efficient and long-lasting air conditioning system. A dirty coil reduces cooling performance, increases energy costs, and can even lead to system failure. Regular maintenance prevents dust, mold, and debris buildup, ensuring better airflow, improved air quality, and optimal AC performance. Cleaning your coils can even get a malfunctioning unit to start again!
This article is going to cover how to do indoor evaporator coil cleaning, when it should be done, what cleaners should be used, how to find the evaporator coil, and more. If you are looking for an article about outdoor condenser coil cleaning, then check out our other article about how to do that.
When and Why Should I Clean my Evaporator Coil
Knowing when evaporator coil cleaning should be done is crucial for maintaining your AC’s efficiency and preventing costly repairs. A dirty coil can lead to poor cooling, higher energy bills, and even system breakdowns. Regular maintenance ensures smooth operation, better air quality, and a longer lifespan for your unit.
Signs your Evaporator Coil Needs Cleaning Include:
- Reduced Cooling Efficiency – The AC struggles to cool the air effectively.
- Higher Energy Bills – The system works harder, consuming more electricity.
- Warm or Weak Air from Vents – The AC blows lukewarm or warm air. Though this can also be a sign of a refrigerant leak.
- Excess Moisture or Water Leaks – Condensation issues leading to pooling water.
- Unpleasant Odors – Musty smells suggest mold or mildew buildup.
- Short Cycling – The AC turns on and off frequently increasing wear.
- Unusual Noises – Hissing or bubbling sounds indicate strain.
- Dust or Debris Around Vents – Visible dust suggests a dirty coil.
- Frozen Evaporator Coil – Ice buildup on the coil occurs. Like warm or weak air, this can also signify a low refrigerant.
How To Find The Evaporator Coil
In a Central AC System
To access the evaporator coil in a central AC system, locate the indoor air handler, usually in a basement, attic, or utility closet. Turn off the power, remove the front access panel using a screwdriver, and carefully expose the coil inside the air handler unit.
In Window AC Units
For window AC units, unplug the unit and remove the front grille or panel, typically secured with screws. If necessary, take out the air filter to access the evaporator coil, which is located behind it. Some models may require removing additional screws or covers to fully expose the coil.
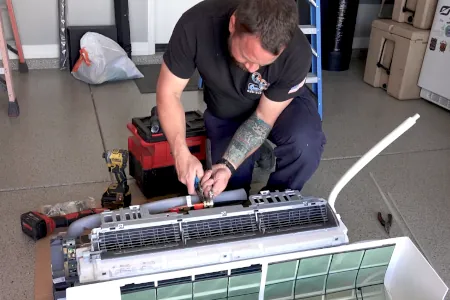
In Mini-Split (Ductless) Systems
To access the evaporator coil in a mini-split system, turn off the power and open the front cover of the indoor air handler. The coil is located behind the air filter. Some models may require additional screws or clips to be removed for full access to the coil.
In Portable AC Units
Choosing The Right Cleaning Solution
Mild Soap and Water
A simple and safe cleaner, warm water mixed with mild dish soap effectively removes light dirt and dust. It’s non-corrosive and safe for coils but may not be strong enough for heavy grime or stubborn buildup, requiring extra scrubbing.
1:1 White Vinegar & Water
A natural and eco-friendly cleaner, vinegar helps dissolve grime and kill mold. It’s safe for coils and inexpensive, but it has a strong odor and may not be effective for extremely dirty coils with heavy grease or thick dust accumulation.
Foam Coil Cleaners
Designed specifically for HVAC coils, these cleaners effectively break down dirt, grease, and debris. Many are no-rinse formulas, making cleaning easier. However, some brands contain harsh chemicals that can damage fins if overused, and ventilation is needed when applying to prevent inhalation risks.
Oven Cleaners (Not Recommended)
Oven cleaners can dissolve tough grime and buildup but are highly caustic and may corrode aluminum fins, leading to long-term damage. They should only be used as a last resort, with extreme care and thorough rinsing to prevent residue from harming the AC system.
Baking Soda and Water Paste
A gentle, DIY solution, baking soda paste removes light grime without damaging coils. It’s non-toxic and easy to rinse. However, it’s not as strong as commercial cleaners, and scrubbing may be required to remove stubborn dirt or thick dust layers.
Hydrogen Peroxide Spray
How To Clean The Evaporator Coil

1.Turn Off The Unit
Turning off the unit is the first, and most important step. This insures you won’t damage anything through electrical shocks or other disturbances. After cleaning the evaporator coil you’ll want to wait a good few hours before turning the unit back on.
2.Remove the Access Panel
To remove the access panel, use a screwdriver to unscrew or unclip it, then carefully lift it off, avoiding damage to internal components or wiring.
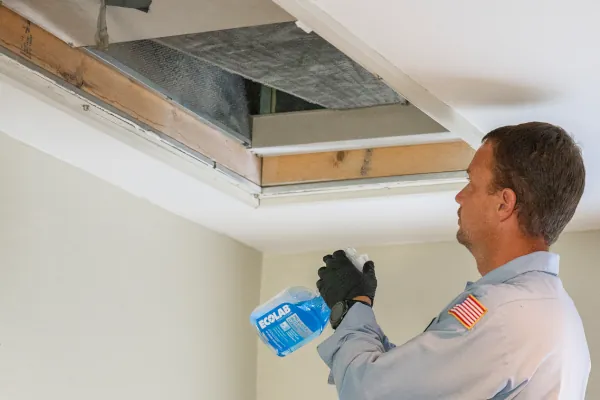
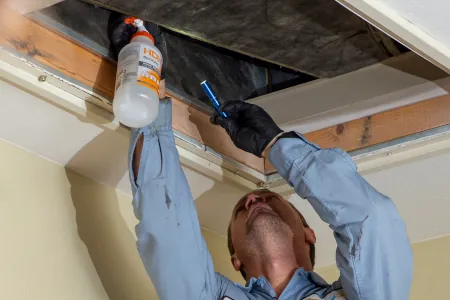
3.Apply The Cleaning Solution
Spray the chosen cleaning solution evenly onto the evaporator coil, ensuring full coverage. Let it sit for the recommended time, usually 5–10 minutes, to break down dirt and grime. For stubborn buildup, gently scrub with a soft brush or cloth. Avoid excessive force to prevent coil damage.
4.Scrub The Evaporator Coils
After applying the cleaning solution, use a soft brush or cloth to gently scrub the evaporator coil, focusing on areas with heavy grime buildup. Avoid using stiff brushes or excessive pressure, as the delicate aluminum fins can bend easily. Work carefully to lift dirt without damaging the coil’s surface.
5.Dry The Coils
After cleaning, allow the evaporator coil to air dry completely before reassembling the unit. This prevents moisture buildup, which can lead to mold growth or system malfunctions. Speed up drying by using a fan or gently wiping excess moisture with a lint-free cloth. Ensure coils are fully dry before restoring power.
Drying typically takes 30 minutes to an hour, depending on airflow and humidity. Using a fan or dry cloth can speed up the process. Be doubly sure that the coils are dry before going to restore power.
6.Restore Power To The Unit
How Often Should Clean Your Evaporator Coils?
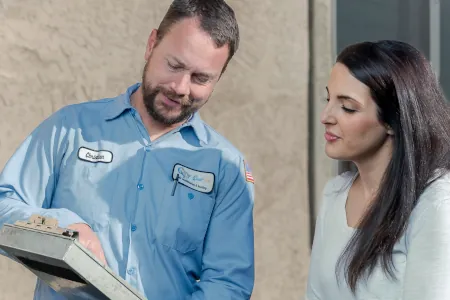
When Should I Call A Professional?
Calling a professional for evaporator coil cleaning ensures a thorough and safe job, as they have specialized tools and expertise. Professionals can identify underlying issues, prevent damage, and offer valuable maintenance tips. This can save time and money in the long run, ensuring your system operates efficiently and reliably. An AC’s evaporator coil is one of the most expensive parts, along with the compressor, and the condenser coil. If your evaporator coil breaks, it’s usually best to get rid of the unit, and get a new one, especially if it’s old.
At Qual-tech we can provide a full clean and inspection for a competitive price. See our AC Maintenance Page for more.
Regular cleaning of the evaporator coil is essential for optimal air conditioning performance, energy efficiency, and indoor air quality. By recognizing the signs that indicate cleaning is needed and following proper maintenance steps, you can prolong your system’s lifespan and help ensure a comfortable home year-round. Be sure to check out our article about cleaning condenser coils if you’d like to know how to clean the outdoor coils.